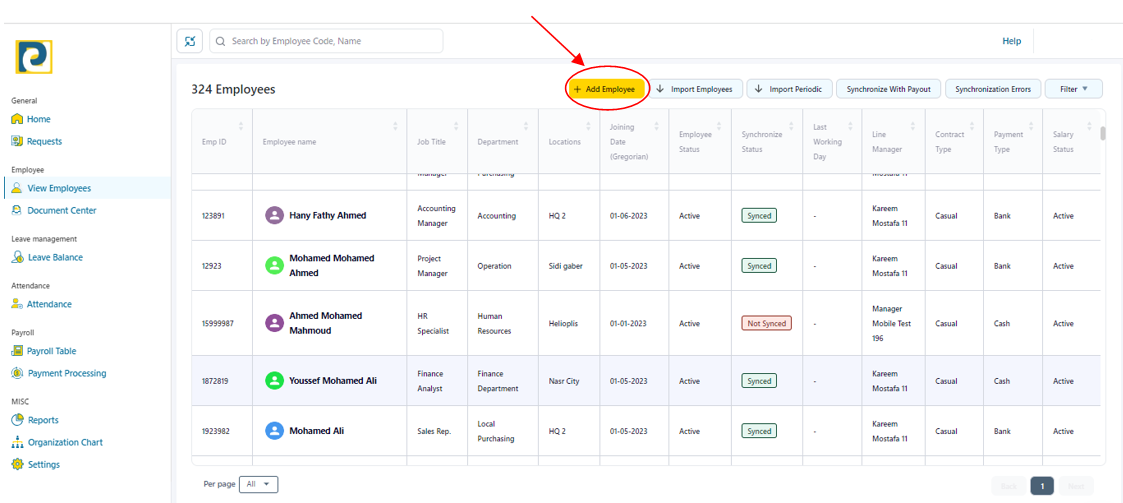
1- Click on “View Employees” from main menu
.png)
2- Click on “Add Employee” button
-General Information
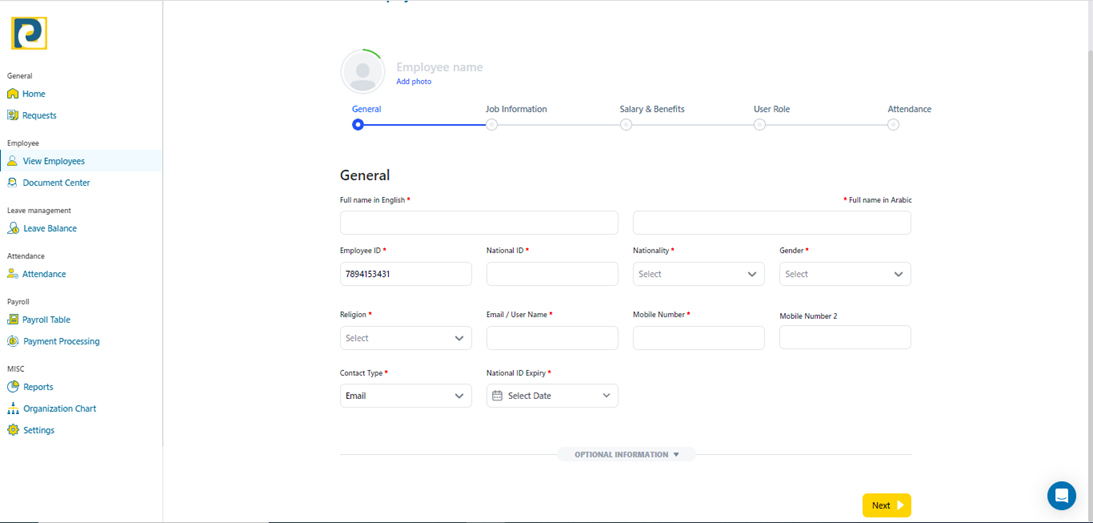
3- Fill in Employee General Information as follows
.png)
Note: All fields that is marked with a red asterisk‘*’ are mandatory fields and cannot be left blank
3.1-Full Name in English: Mandatory field such that Employee Name should be typed in English Language
3.2-Full Name in Arabic: Mandatory field such that Employee Name should be typed in Arabic Language as written in National ID card
3.3-Employee ID: Mandatory field that is computed automatically by incrementing last Employee ID by 1 and can be entered manually but should be unique for every employee
3.4-National ID: Mandatory field where National ID must be valid, unique for every employee and consists of 14 digits
3.5-Nationality: Mandatory field where Nationality of the added employee is selected from pre-defined nationalities through the drop-down menu
3.6-Gender: Mandatory field where gender is selected through drop-down menu
3.7-Religion: Mandatory field where religion is selected from “Muslim – Christian or Other” options through drop down menu
3.8- Email/Username: Mandatory field that should be unique for every employee and typed in correct e-mail format
3.9-Mobile Number: Mandatory field that should be unique for every employee and consists of 11 numbers
3.10-Mobile Number: Optional field that could be left blank
3.11-Contact Type: Mandatory field that is either “Email” or “Mobile”
3.12-Nationa ID Expiry: Mandatory field of Expiry date of National ID
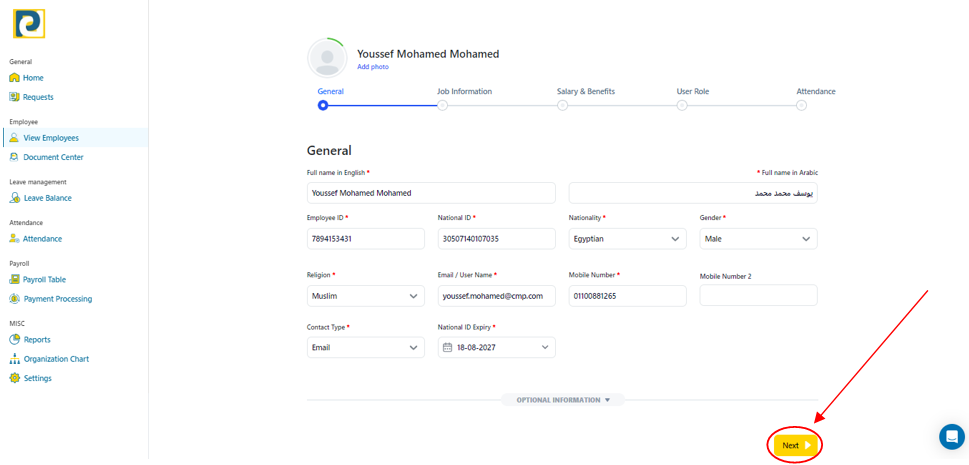
3.13-Optional Information that could be left blank or added upon need
4- After filling in employee general Information, Click on “Next” button
.png)
-Job Information
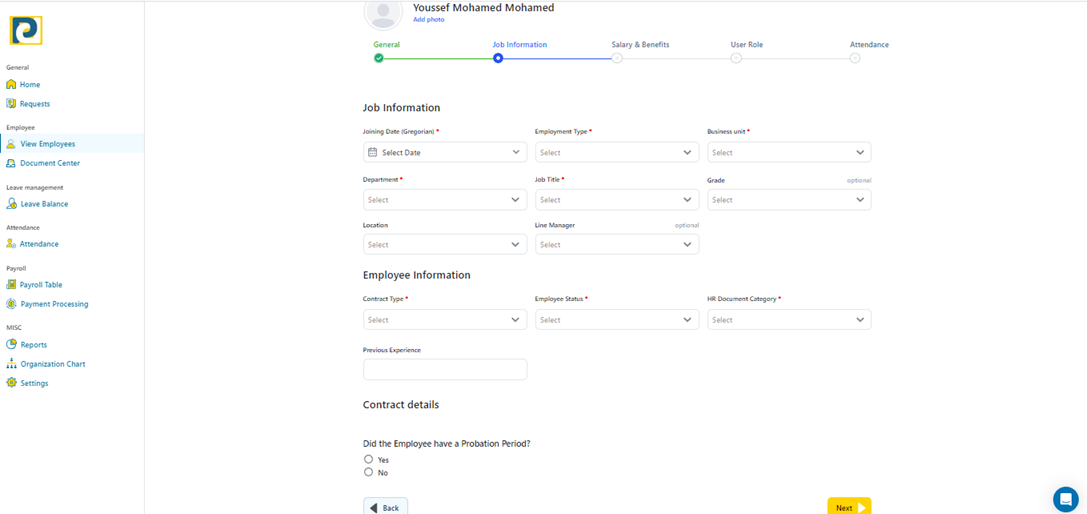
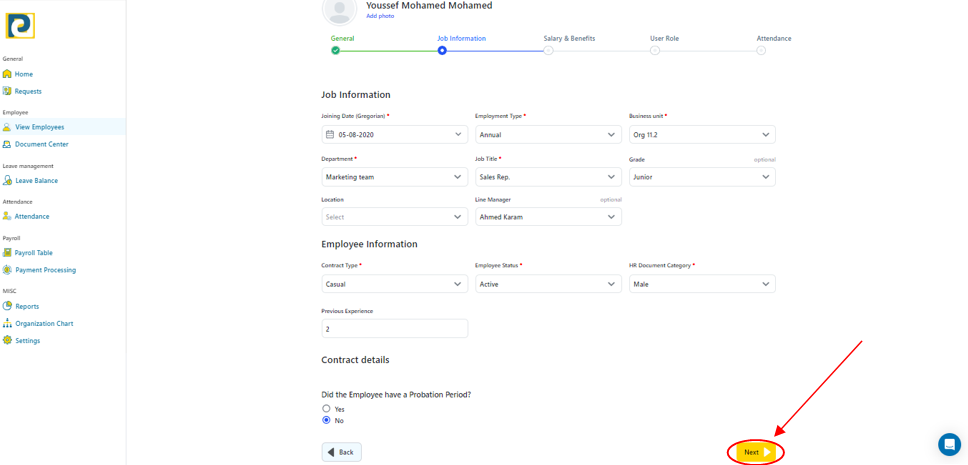
5- Fill in employee job information as follows
.png)
Note: All fields that is marked with a red asterisk‘*’ are mandatory fields and cannot be left blank
5.1-Joining Date: Mandatory field of Gregorian Joining Date of employee to the Organization
5.2-Employment Type: Mandatory field that is chosen from pre-added employment types in Employment type Settings
5.3-Business Unit: Mandatory field that is chosen from pre-added business units in Organization Settings
5.4-Department: Mandatory field that is chosen from pre-added departments in Organization Settings
5.6-Job title: Mandatory field that is chosen from pre-added titles in Organization Settings
5.6-Grade: Optional field that is chosen from pre-added job grades in Organization Settings
5.7-Location: Optional field that is chosen from pre-added locations in Organization Settings
5.8-Line Manager: Optional field that is chosen from pre-added employees
5.9-Contract type: Mandatory field which is either “Casual” or “Permanent”
5.10-Employee Status: Mandatory field which is either “Active – Under registration or Resigned”
5.11-HR Document Category: Mandatory field which is chosen from pre-added Employee Document Categories in Employment type Settings
5.12-Previous Experience: Optional field which indicates the Number of Experience Years
5.13-Probation: if the employee has a probation period or not if “Yes” is selected, probation period is automatically set to 90 days and could be changed
6- After filling in Job Information, click on “Next” button
.png)
-Salary & Benefits
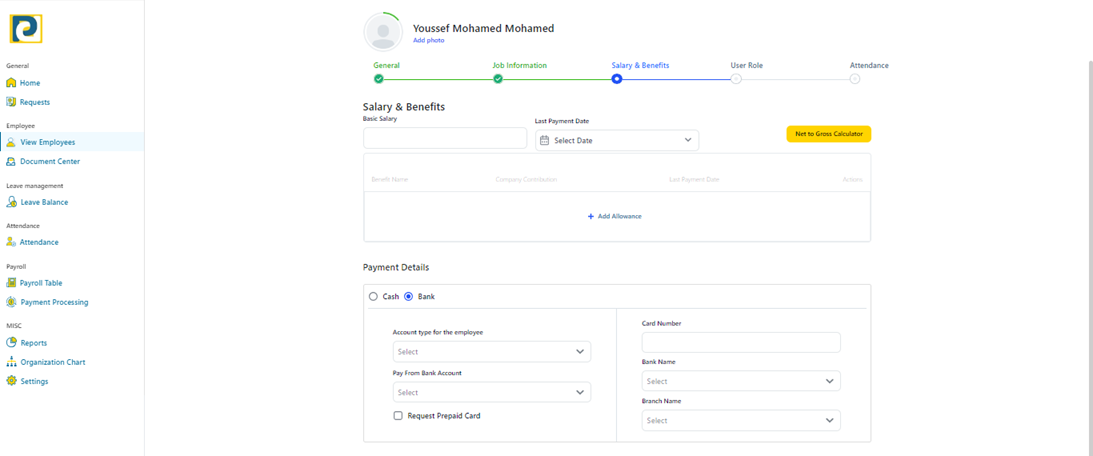
7- Fill in Salary & Benefits Information as follows
7.1 Salary & Benefits and Payment Details
.png)
7.1.1-Basic Salary: Basic Salary of employee in numbers, “Net to Gross Calculator” button could be used to automatically calculate Gross Salary from Net Salary
7.1.2-Add Allowance: Allowances could be added to employee profile from pre-added benefits from Periodic Allowances in Payroll Management settings with a requirement of entering Company Contribution amount and last payment date
7.1.3-Payment Method: is set by default to cash but could be either “Cash” or “Bank”
7.1.3.1- If Payment Method is set to “Bank”, Payment Account type is required which can be either “Bank Card” which requires entering Bank Account Card Number, Bank Name and Branch Name from pre-defied banks OR “Bank Account” which requires entering Bank Account Number, Bank Name and Branch Name from pre-defied banks OR “Fawry Prepaid Card” that does not require any additional information OR “Wallet Number” that will be automatically set to Mobile Number entered in the preceding step
7.1.3.2-Pay from Bank Account: Organization Bank Account Number or Main Mobile Wallet number is selected from pre-added Bank Accounts in Payroll Management Settings
7.1.3.2-Request Prepaid Card: A Prepaid card could be requested to be issued for the employee
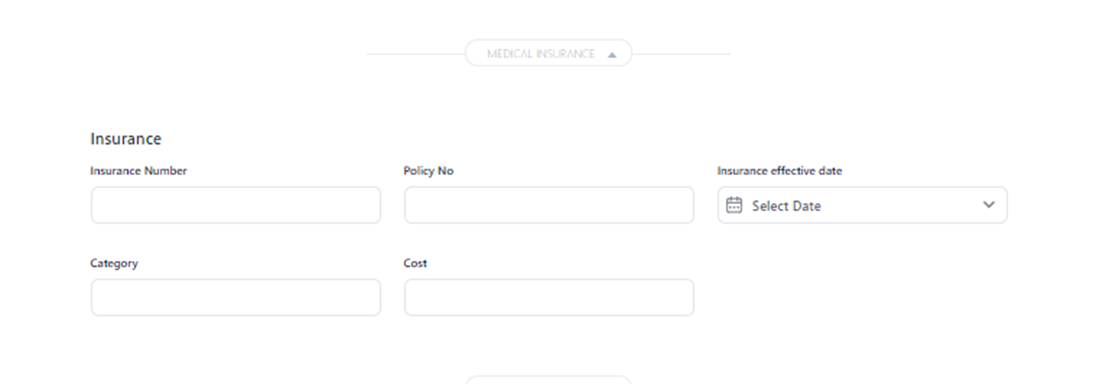
7.2 Medical Insurance (Optional)
.png)
7.2.1-Insurance Number
7.2.2-Policy No
7.2.3-Insurance effective date: Gregorian date of effective day
7.2.4-Category: Manually typed which indicated Medical Insurance Category date
7.2.5-Cost: Medical Insurance cost in EGP
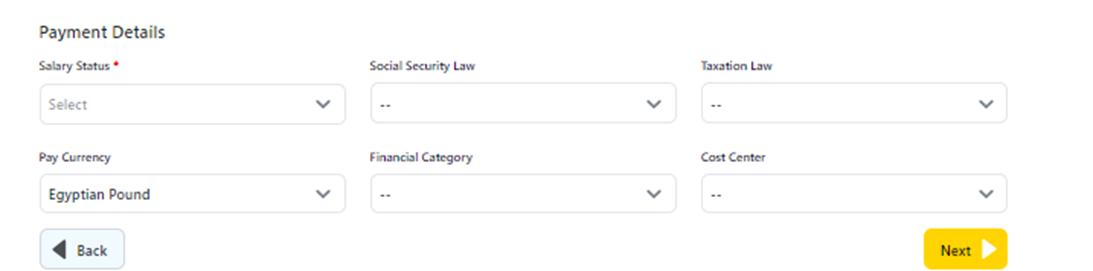
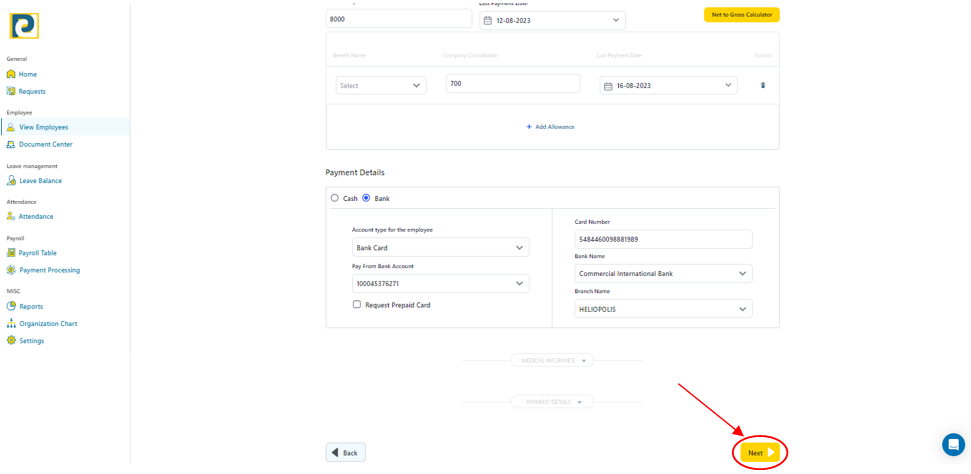
7.3- Payment Details (Optional except for Salary Status)
.png)
7.3.1-Salary Status: Mandatory field that could be either “Active” or “Suspended”
7.3.2-Social Security Law: could be left empty or chosen from pre-added Social Security Laws in Laws Settings, notice that Egypt Social Security Law is pre-defined
7.3.3-Taxation Law: could be left empty or chosen from pre-added Taxation Laws in Laws Settings, notice that Egypt Social Security Law is pre-defined
7.3.4-Pay Currency: chosen from pre-defined currencies either “UAE dirham – Egyptian Pound – Euro – Saudi Riyal – US Dollars”
7.3.5- Financial Category: chosen from pre-added Financial Categories
7.3.6-Cost Center: chosen from pre-added Cost Centers
8- After Filling in the required Salary & Benefits Information, click on “Next” button
.png)
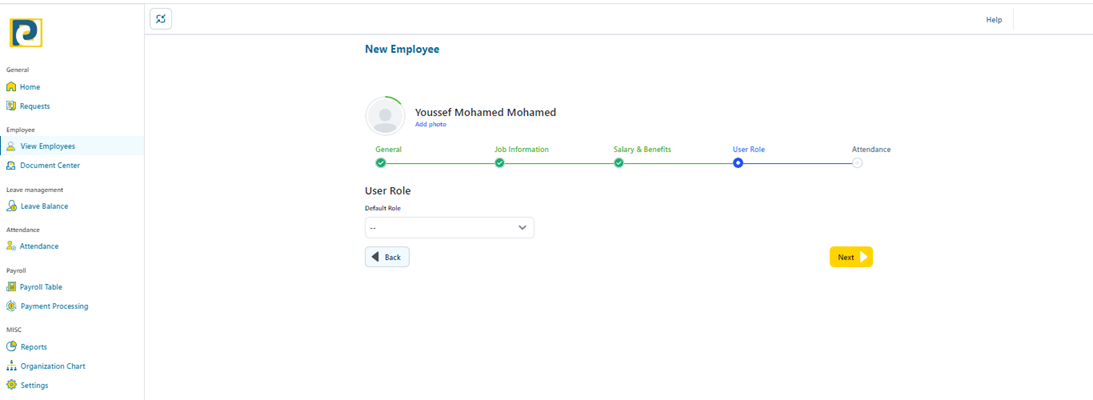
-User Role
9- Select “User Role” from pre-defined roles , Roles Information could be viewed from “Settings” in main menu under “Roles” tab
.png)
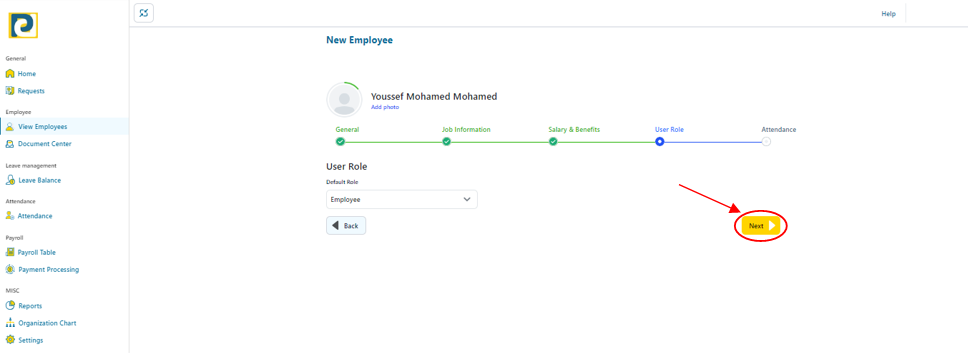
10- After choosing the required role, click on “Next” button
.png)
-Attendance
11- Fill in Attendance details as follows

11.1 - Attendance Policy: chosen from pre-added attendance policies in Attendance Rule Settings
11.2 - Attendance Type: either “Attendance Machine” or ” Reverse”
11.3 - Work Group: chosen from pre-added work groups in Attendance Rule Settings
11.4 - Machine Code: Employee Code in Attendance Machine and that field disappears if Attendance Type is set to “Reverse”
11.5 - GeoLocation Type : could either be
-
Specific Geo Location to record attendance from a certain location added in geo location settings
-
Free Geo Location where Empoyee can record attendance in any location
-
Multi Locatoin where Employee can record attendance in a certain locations identified by a geo location set
12 - After filling in the required Attendance Information, click on “Next” button
